               Seven common tool setting methods for CNC machine tools
1. Trial cutting method
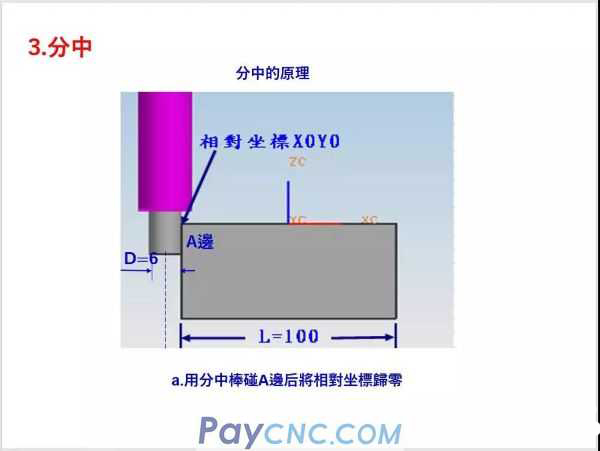
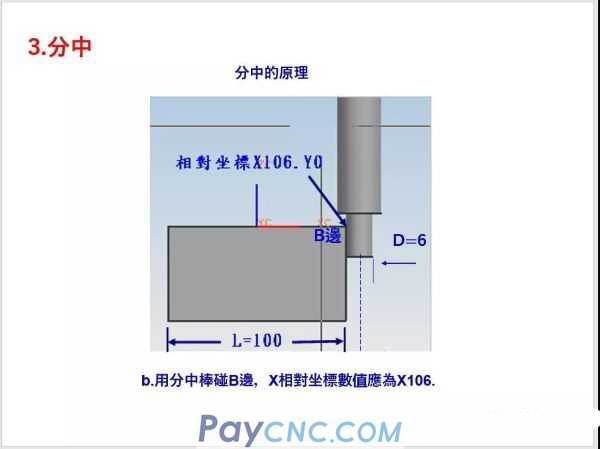
This method is simple and convenient, but it will leave cutting marks on the surface of the workpiece, and the tool setting accuracy is low. Take the tool setting point (here coincides with the origin of the workpiece coordinate system) at the center of the workpiece surface as an example, adopting the bilateral tool setting method.
Applicable environment: There is only one piece of blank and excess thickness or length and width on the blank needs to be removed
Advantages: fast
2. Feeler gauge, standard mandrel, block gauge tool setting method
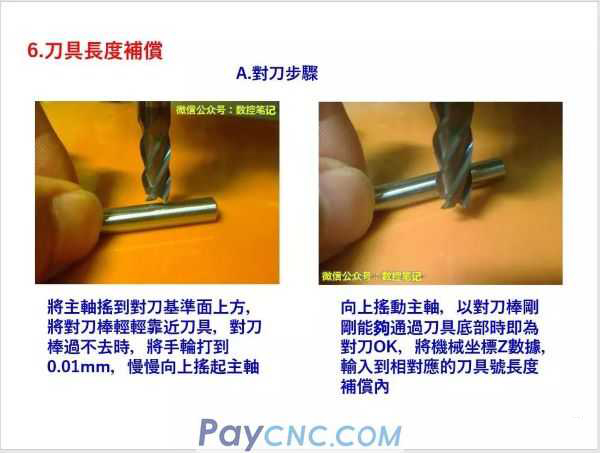
This method is similar to the trial cutting tool setting method, except that the spindle does not rotate during tool setting. A feeler gauge (or standard mandrel or block gauge) is added between the tool and the workpiece, and the feeler gauge just cannot twitch freely. Pay attention to the calculation In the case of coordinates, the thickness of the feeler gauge should be subtracted. Because the spindle does not need to rotate for cutting, this method will not leave traces on the surface of the workpiece, but the tool setting accuracy is not high enough.
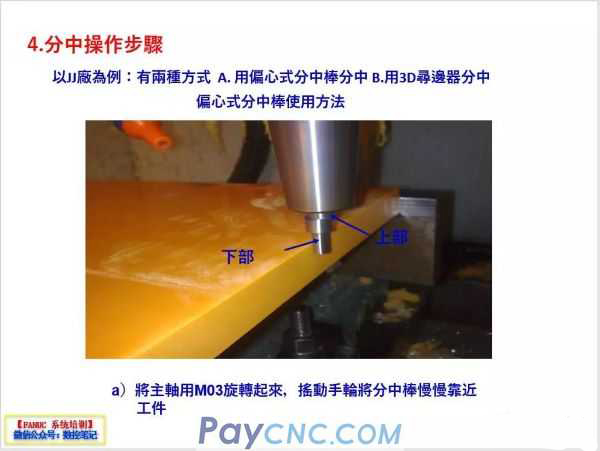
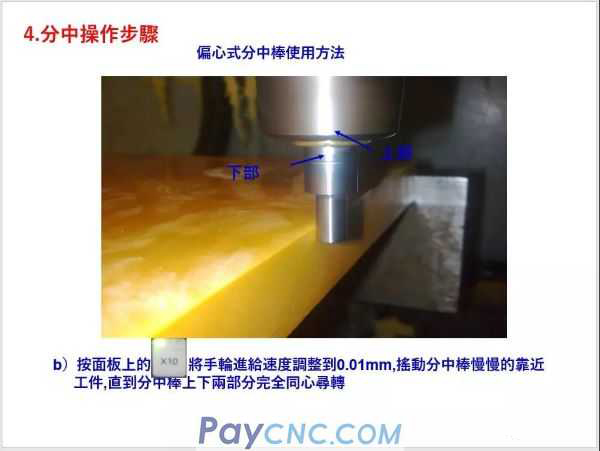
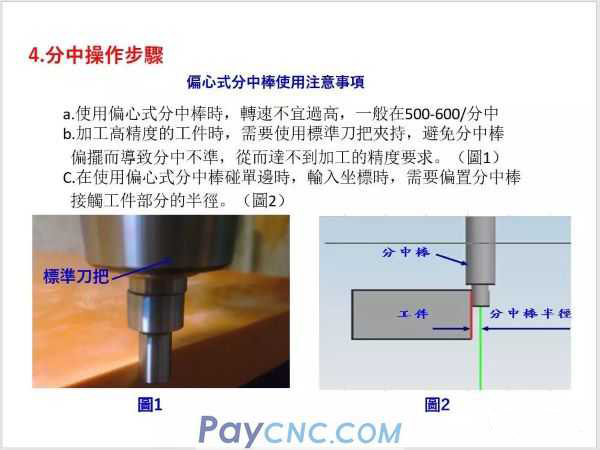
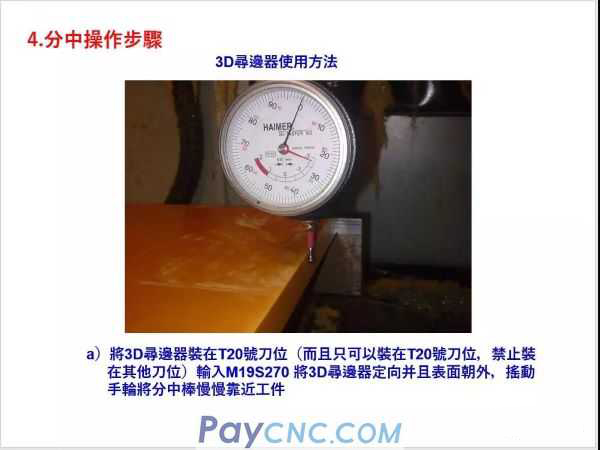
3. Tool setting method using edge finder, eccentric rod and axis setter
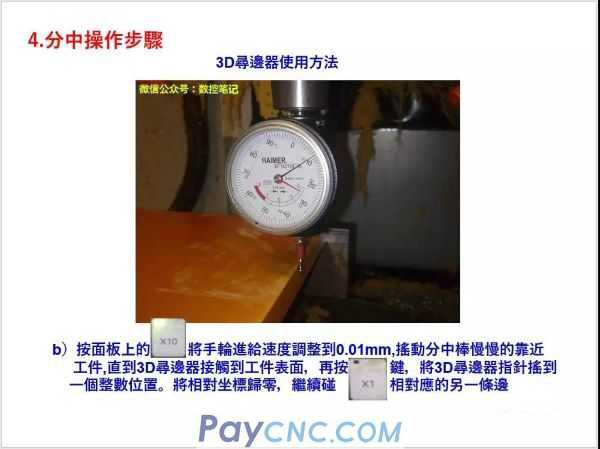
The operation steps are similar to the trial cutting tool setting method, except that the tool is replaced with an edge finder or an eccentric rod. This is the most commonly used method. High efficiency, can ensure the accuracy of tool setting. When using the edge finder, you must be careful to make the steel ball part slightly contact the workpiece, and the workpiece to be processed must be a good conductor, and the positioning reference surface has a good surface roughness. The z-axis setter is generally used for transfer (indirect) tool setting.
Applicable environment: the score when the accuracy is not more than 0.02MM.
Advantages: high versatility
4. Transfer (indirect) knife setting method
Processing a workpiece often requires more than one knife. The length of the second knife is not the same as the length of the first knife. It needs to be re-zeroed, but sometimes the zero point is processed and the zero point cannot be retrieved directly or not. It is permissible to damage the machined surface, and some tools or occasions are not good for direct tool setting. In this case, indirect change can be used.
5. Top tool setting method
(1) Tool setting in x, y direction. ① Install the workpiece on the machine tool table through the fixture and replace the center.
②Move the worktable and the spindle quickly, let the top move to the top of the near workpiece, find the center point of the drawing line of the workpiece, reduce the speed to move the top close to it.
③Use the fine-tuning operation to make the center slowly approach the center point of the workpiece line until the tip of the center is aligned with the center point of the workpiece line, and write down the x and y coordinate values in the machine coordinate system at this time.
(2) Remove the center, install the milling cutter, and use other tool setting methods such as trial cutting and feeler gauge to obtain the z-axis coordinate value.
6, the dial indicator (or dial indicator) knife method
Dial indicator (or dial indicator) tool setting method (usually used for round workpiece setting)
Applicable environment: centering when the accuracy is high or the edge finder cannot meet the requirements (for example, it is necessary to center the circle with a diameter less than 4MM)
Advantages: precise
(1) Tool setting in x, y direction.
Install the mounting rod of the dial indicator on the tool holder, or attach the magnetic seat of the dial indicator to the spindle sleeve, move the worktable to move the spindle center line (ie the tool center) approximately to the center of the workpiece, and adjust the magnetic seat The length and angle of the telescopic rod make the contact of the dial indicator touch the circumferential surface of the workpiece, (the pointer rotates about 0.1mm) slowly rotate the main shaft by hand to make the contact of the dial indicator rotate along the circumferential surface of the workpiece, and observe The movement of the dial indicator pointer, slowly move the axis and the axis of the worktable. After many times of repetition, the dial indicator pointer is basically at the same position when the main shaft is rotated (when the meter head rotates one week, the amount of movement of the pointer is Within the allowable tool setting error, such as 0.02mm), the center of the spindle can be considered as the axis and the origin of the axis.
(2) Remove the dial indicator and install the milling cutter, and use other tool setting methods such as trial cutting, feeler gauge method, etc. to obtain the z-axis coordinate value.
7. Tool setting method with special tool setting device
Traditional tool setting methods have disadvantages such as poor safety (such as feeler gauge setting, hard hitting the tip of the knife, easy to crash), which takes up more time (such as trial cutting requires repeated cutting several times), and large random errors caused by humans. The rhythm of CNC machining is not conducive to the function of CNC machine tools. Tool setting with a special tool setting device has the advantages of high precision, high efficiency, and good safety. It simplifies the tedious work of tool setting guaranteed by experience, and ensures the high efficiency and high precision of CNC machine tools. A special tool that is indispensable for tool setting on a CNC machine.
|
 |
| Products Catalogue | Home | About Us | Retrofit | Download | News | Tech Support | Contact Us | |
|
|
|
